Making an Acorn Necklace
Materials You’ll Need:
- Acorns: Gather a few acorns with their caps intact. Look for acorns that are a good size for a necklace pendant.
- Jewelry Eye Pin or Screw Eye: These are small metal loops that you’ll use to attach the acorn to the necklace chain. You can find these at most craft stores in the jewelry-making section. A screw eye is often easier for beginners.
- Jewelry Pliers: You’ll need these to manipulate the eye pin if you use one.
- Cord or Chain: This will be the necklace itself. You can use a variety of materials like leather cord, waxed cotton cord, or a metal chain.
- Jewelry Glue or Super Glue: A strong, clear-drying adhesive.
- Drill with a small bit (optional): If you’re using a screw eye and the acorn is very hard, a small pilot hole can make it easier to screw in the eye.
- Varnish or Clear Nail Polish (optional): This will help preserve the acorn and give it a nice, shiny finish.
Steps:
- Prepare the Acorn:
- Start by cleaning the acorn. Use a dry cloth to wipe away any dirt.
- If the acorn cap is loose, carefully remove it.
- Ensure the acorn and cap are completely dry. If you’ve just gathered them, it’s a good idea to let them sit for a few days to dry out.
- Attach the Cap to the Acorn:
- Apply a small amount of jewelry glue or super glue to the top of the acorn where the cap sits.
- Carefully press the cap back onto the acorn, ensuring it’s securely in place.
- Let the glue dry completely according to the manufacturer’s instructions. This is a crucial step to prevent the cap from falling off later.
- Insert the Eye Pin or Screw Eye:
- Using a Screw Eye: This is the easiest method. Take your screw eye and gently twist the pointed end into the top of the acorn cap. The small hole that was originally for the acorn stem is a great place to start. Continue twisting until the entire screw is embedded and only the loop is showing.
- Using a Jewelry Eye Pin: If you’re using an eye pin, you may need to use your pliers to bend the pin into a loop at the end. Once you have a loop, you can either glue the straight end into a small hole drilled into the acorn cap, or you can wrap it around the cap for a more secure hold. This method can be a bit more advanced.
- Preserve the Acorn (Optional):
- To make your necklace last longer and give it a polished look, you can apply a layer of varnish or clear nail polish.
- This step helps prevent the acorn from cracking or deteriorating over time. It also gives it a nice, glossy finish.
- Make sure to let the varnish or nail polish dry completely before moving on to the next step.
- Assemble the Necklace:
- Now that your acorn pendant is ready, it’s time to put it on the chain or cord.
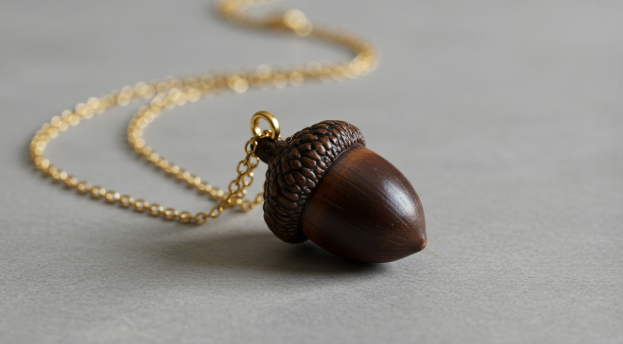
- Simply slide the necklace chain or cord through the loop of the eye pin or screw eye.
- If you’re using a chain, you may need to use a jump ring (a small, circular metal loop) to attach the acorn pendant to the chain. Jump rings are also available at craft stores.
And that’s it! You’ve just made your very own acorn necklace. You can make several and vary the types of cord and chain to create a unique collection. Enjoy your beautiful, handcrafted piece of nature-inspired jewelry!