How to Make a Pine Cone Owl
A pine cone owl is a classic fall craft that’s easy to make and a great way to use natural materials. There are a few different ways to approach this project, but here is a general guide to making a pine cone owl for fall.
Materials You’ll Need
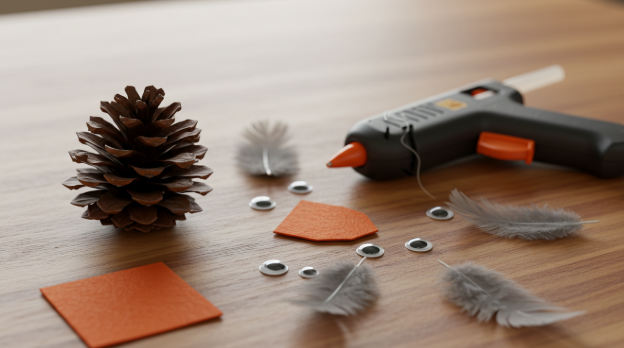
- Pine cones: Look for open, dry pine cones. You can find them in your yard or a park, or buy them at a craft store.
- A way to attach pieces: A low-temp hot glue gun is very effective, but you can also use tacky craft glue, glue dots, or instant-grab glue.
- Materials for the face and wings: This is where you can get creative. Some common options include:
- Felt, foam, or cardstock in fall colors (brown, orange, yellow, white, etc.)
- Acorn caps (for the eyes)
- Googly eyes
- Small feathers
- Cotton balls or wool fleece (to add fluff)
- Scissors
- Paintbrushes and paint (optional, if you want to paint any of your materials)
Instructions
- Prepare your pine cones. If you’re using pine cones you’ve found outside, it’s a good idea to clean and dry them first. You can bake them on a cookie sheet at 250°F (120°C) for about 45 minutes to get rid of any potential bugs and help them open up. Let them cool completely before you begin crafting.
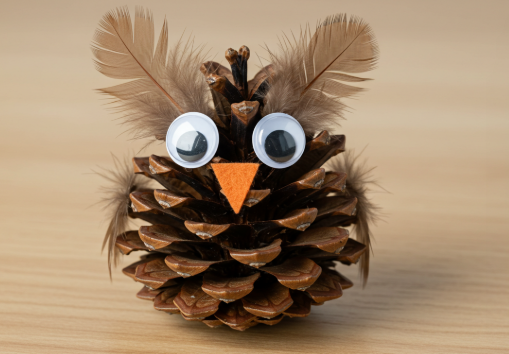
- Create the face.
- Eyes: The eyes are a key feature. You can glue two acorn caps to the front of the pine cone as a base. Then, glue googly eyes inside the caps for a fun, whimsical look. Alternatively, you can cut circles from felt or foam and add googly eyes or draw pupils with a black marker.
- Beak: Cut a small triangle from orange or yellow felt, foam, or cardstock. Glue it below and between the eyes.
- Add the wings.
- Cut out two wing shapes from felt, foam, or cardstock. A simple teardrop or half-circle shape works well.
- You can use small feathers or pieces of bark from a nature walk for a more natural look.
- Glue one wing to each side of the pine cone.
- Finish your owl.
- Feet: For feet, you can cut out a small shape with two or three “toes” from felt or cardstock and glue it to the bottom of the pine cone. You can also use small twigs or brown chenille stems (pipe cleaners).
- Fluff: To add a fluffy, feathered look, you can tear up pieces of cotton balls or wool fleece and stuff them between the scales of the pine cone.
- Display: Once all the glue is dry, you can display your owl on a shelf, mantel, or fall tablescape. You can also glue a loop of string to the top of its head to turn it into an ornament for a fall-themed tree.
Variations and Tips
Kid-friendly options: If you’re crafting with children, use glue dots or tacky glue as a safer alternative to a hot glue gun. You can also pre-cut the shapes to make it easier for them to assemble.
For a snowy owl: Use white felt and cotton balls, and paint the pine cone with white paint.
Use natural materials: For a true nature craft, use acorn caps for the eyes, a tiny pumpkin seed for the beak, and small leaves or pieces of bark for the wings.