How to Make a Fall Pumpkin Mason Jar
Making an easy fall pumpkin mason jar is a fun and simple craft that’s perfect for decorating your home for the autumn season. Here is a step-by-step guide with a popular and straightforward method: painting the jar.
Materials You’ll Need
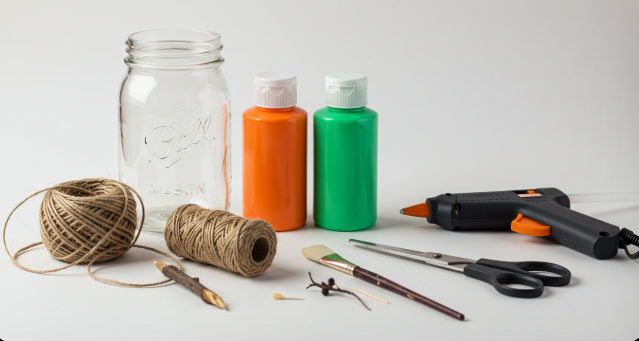
- Mason jar: Any size will work.
- Acrylic craft paint: Orange and green.
- Twine or jute ribbon: For the finishing touch.
- Stem material: A small twig, a wine cork, or a wooden peg.
- Hot glue gun and glue sticks: For assembly.
- Paintbrush or foam brush: A foam brush is great for a smooth, streak-free finish.
- Scissors
Instructions


- Prepare the jar: Make sure your mason jar is clean and dry. For a project with less mess, you can paint the outside of the jar. Some crafters prefer to paint the inside to create a glossy finish, but this can be more challenging and requires more paint. For this guide, we’ll focus on painting the outside.
- Paint the pumpkin body:
- Using your orange acrylic paint and a foam brush, apply a thin, even coat to the outside of the mason jar.
- Leave the very top rim unpainted so the lid can still screw on.
- Allow the paint to dry completely. This may take a few hours.
- Apply a second coat to ensure the color is vibrant and opaque. Depending on the brand and color, you may need a third coat. Let it dry fully.
- Create the stem:
- Take your mason jar lid (the metal flat disc) and the outer ring.
- Paint the lid and ring with your green acrylic paint. You may need two coats for full coverage.
- Once the green paint is dry, use a hot glue gun to attach your stem material (wine cork, twig, or wooden peg) to the center of the lid. Hold it in place until the glue sets.
- Add the finishing touches:
- Take a small piece of twine and wrap it around the base of the stem. You can use a dab of hot glue to secure the ends. This adds a rustic, natural feel.
- If you want, you can cut out small leaf shapes from green felt or cardstock and glue them next to the stem. You can also add some curled vines by wrapping a thin piece of green twine around a pencil to create a spiral before gluing it on.
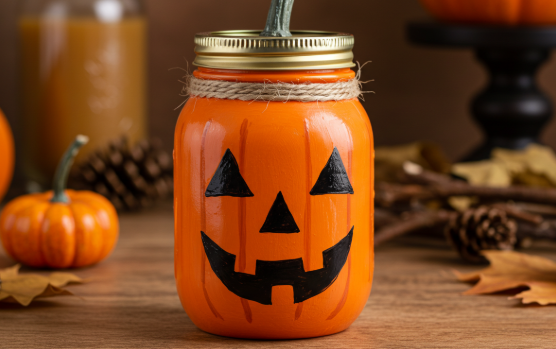
- Be creative, using black and red paint this can be used as a Halloween decoration or add flowers and use as a fall vase (see above photos).
- Assemble and display:
- Place the decorated lid with the stem and twine back onto the jar.
- You can now display your pumpkin mason jar as is, or you can fill it with a battery-operated candle or fairy lights to make it glow. It also makes for a great candy jar or a simple vase for fall flowers.